


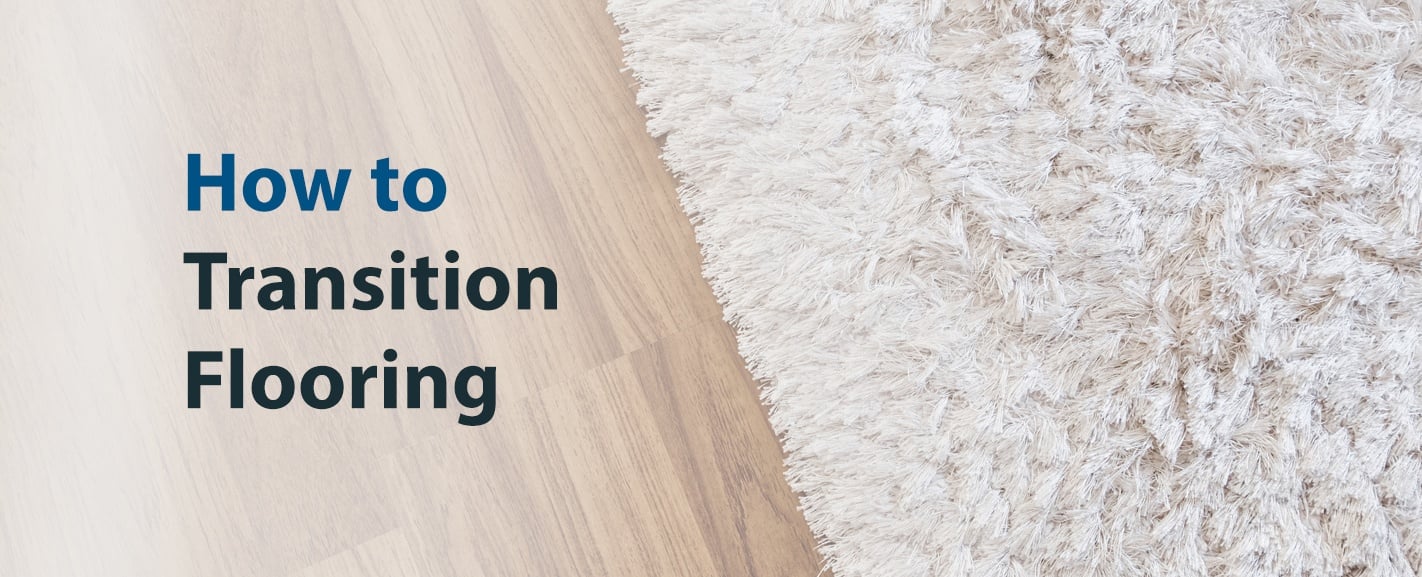
If the flooring in every room of your home could flow together perfectly, you could simply pick one flooring type, have it installed, and go on to enjoy your cohesive look. While this sounds ideal, it’s just not realistic for many homes. The rooms in your home have different uses, which means they have different flooring needs. This is where transition flooring enters the picture.
Think about it: Living rooms call for cozy, soft flooring for relaxation, while bathrooms and kitchens require flooring with increased water resistance. But at some point, the different flooring types in your home meet. Whether bathroom tile meets hallway carpet or kitchen vinyl meets dining room laminate, you’ll likely need different flooring transitions to make it work in a way that’s functional and visually appealing.
So, how do you transition two types of flooring? Let’s dive deeper into all the things you need to know about how to do floor transitions for each part of your home.
The Importance of Transitioning Flooring
When you select new flooring, you focus on the styles that accentuate your home. But an equally important element is how your new flooring will transition into other flooring types in your home. These floor transitions serve three essential purposes: design, safety, and durability. The transitions you use will depend on the actual flooring types you’re transitioning.
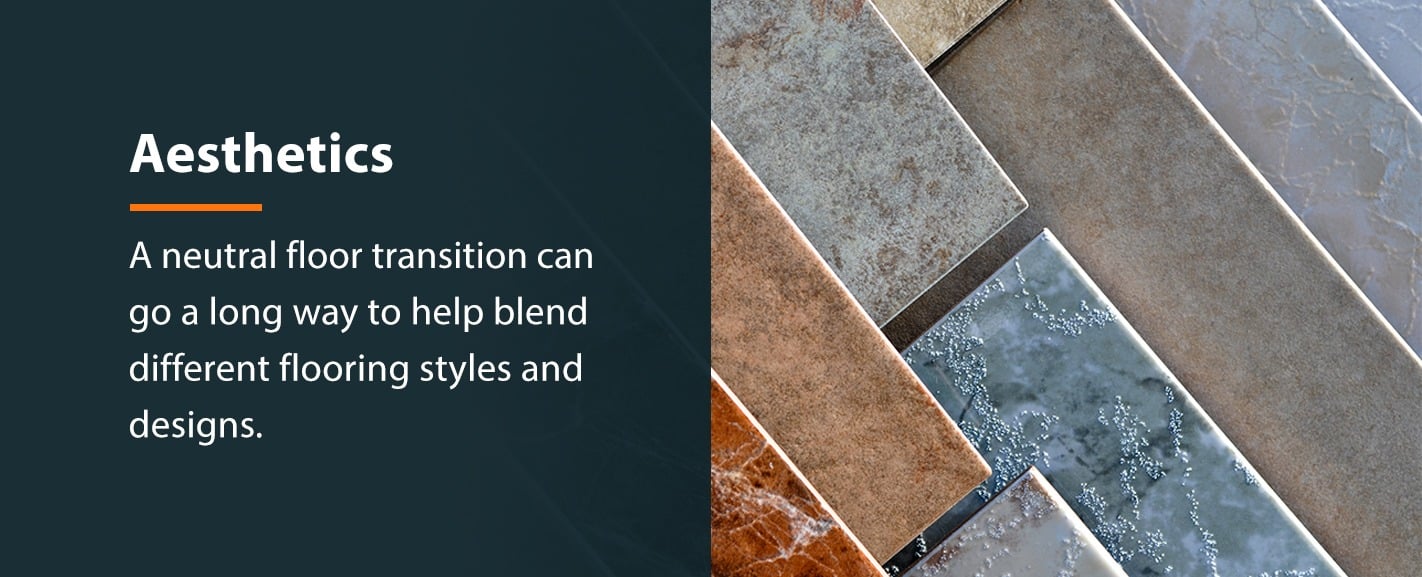
1. Design
Flooring transitions help smooth out the look where jarring colors and textures meet. A neutral floor transition can go a long way toward blending different flooring styles and designs.
If you use multiple colors for the floors throughout your home, you can ensure there’s a neutral color between them to guide you seamlessly from one room to the next. You can also use your transition as an accent to highlight the look of either room it supports.
Transitions between floors can also cover up unsightly gaps to make your flooring appear seamless. Some flooring types contract or expand due to temperature or humidity changes, leaving gaps after installation. Your transition flooring can hide these areas and create an eye-pleasing break from one room to another.
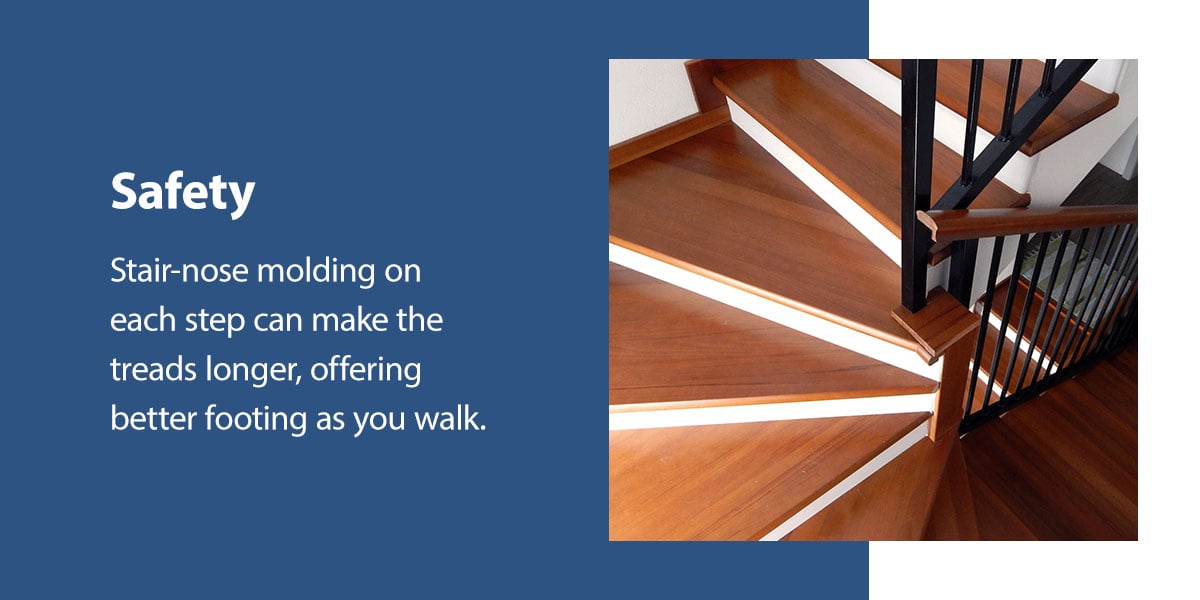
2. Safety
Height differences are a big concern where flooring types meet. If thick tile meets a low-pile carpet, you may have a small—but potentially dangerous—height gap. Even minor height differences could become tripping hazards, especially for small children. In these scenarios, flooring transitions act as mini ramps to create a safe gradient from a high to a low floor type.
Transition flooring can also help stairs become safer in your home. Stair-nose molding on each step can create a finished look and protect your steps. It can also make the treads longer, giving you more safety by offering better footing as you walk.
3. Durability
Transitions protect the edges of your flooring from wear, tear, and fraying. Floating flooring such as laminate needs room to expand and contract as the temperature changes, especially if you install it near a doorway. Otherwise, the floor could crack or warp when it comes into contact with the edge of another flooring material.
Adding transition flooring can provide the flexibility your floor needs. Small gaps between the floor types can give way to expanding or contracting. With transitions, your floor can breathe without showing imperfections to you or your guests.
Transitions Between Similar Floors
“Similar floors” could refer to the same flooring material or different flooring materials with similar thicknesses. Although height differences may not be as much of an issue between similar flooring, transitions can help reconcile aesthetic concerns. Depending on your flooring, you can choose between two options:
Option 1: Meet Without Transition Strip
In some cases, you may be able to transition flooring without installing a transition strip. Your flooring may qualify for this option if the flooring types have the same thicknesses, the edges don’t require protection, or the designs and colors already mesh well.
This option isn’t standard but may work for transitions from tile to tile flooring. Before you pursue this option, talk to your flooring professional to ensure it’s safe and beneficial in your situation.
Option 2: Meet With Transition Strip
In most cases, it’s wise to go with installing transition strips between flooring types. Floors with similar thicknesses benefit from a transition type known as T-molding. While the floor transition strips don’t adjust for height, they provide a smooth shift from one flooring to the next.
If you’re transitioning from one hardwood to another, you could also opt for a seam binder instead of a transition strip. Seam binders are like regular wood floor planks that run along the edge of your flooring. Your installation crew should be able to take flooring materials and transition best practices into account. For example, if you’re transitioning between two hardwood floors where expansion and contraction are a concern, make sure the T-molding or seam binder isn’t attached to the flooring.
Types of Floor Transition Molding
Most flooring materials have different heights and thicknesses that can affect the transition from one room to the other. To make the floors more consistent, you might be able to install padding and underlayment when you first lay them down—but you may have to use a threshold or transition strip to create an even flow.
As we’ve discussed, different types of flooring require installing transition molding or strips. In addition to their function, transition moldings have various material options. You can typically find transition strips in metal, vinyl, or wood. The material you pick will depend on your preferences, what matches your flooring, and your durability needs.
Here are some common molding types and their various uses:
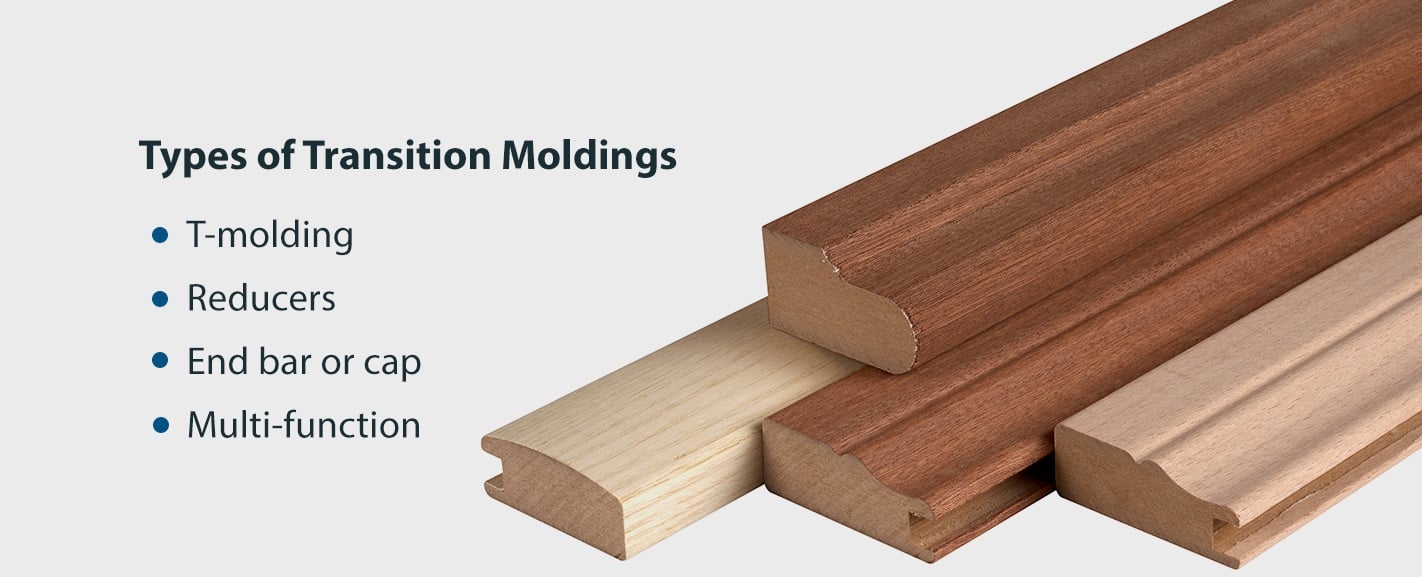
1. T-Molding
T-molding has a long vertical piece attached to the center of a shorter horizontal piece. This shape creates equal-sized gaps on each side of the molding, which allows it to transition between similarly-sized floors.
When transitioning flooring of different heights, you can use caulking or padding to make the lower floor the same as the taller floor. In that case, you’ll want to place the side of the T-strip on the part with the lower finish height. This transition can also benefit floor types of a similar thickness at doorways.
While some T-moldings require screws and tracks, others need glue and nails. The T-molding doesn’t float like other options. Instead, you fasten it on the subfloor. It also allows your floor to expand and contract as needed, helping you prevent cracks. This option is excellent for those with floors that transition from laminate to hardwood.
2. Ramp
Flooring specialists use a ramp to transition when there is a significant height difference, such as when a concrete slab has tile or hardwood floors. You can also find smaller ramps for installing tile, which go around the tile’s edge and taper the material next to it.
Ramps generally come in PVC or metal. They must be strong enough to hold up under foot traffic to avoid creating a tripping hazard. Ramps can be single pieces or have a two-part profile. Heavy-duty strips are best for high-traffic areas; you can find some with slip-resistant properties for added safety.
Beyond adding these pieces for safety, you can incorporate them as a visual element in your home—their finishes can easily complement luxury looks and high-end materials.
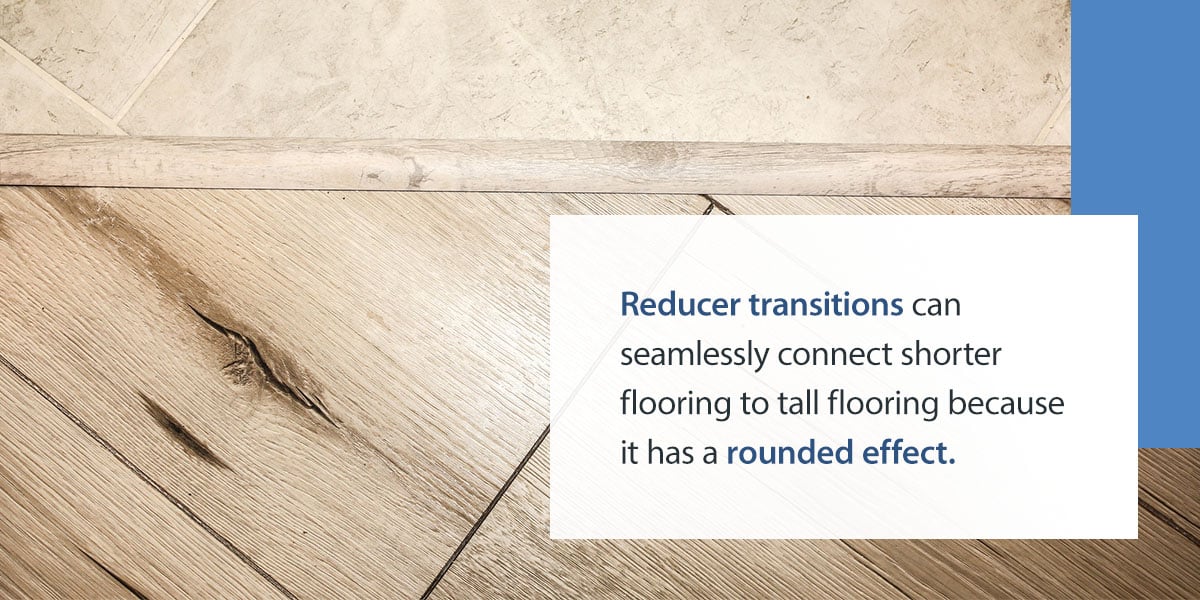
3. Reducers
Reducer transitions can seamlessly connect shorter flooring to tall flooring because it has a rounded effect. Reducers can have an even arc shape for minor height differences. These pieces may also have a flat top ramp shape that curves down toward the shorter flooring for more pronounced height differences. A reducer strip differs from a ramp in that it locks into place instead of bolting into the subfloor.
Overlap reducers have an additional function, connecting them from a floating floor to other floor types. Many homeowners use this option to connect hardwood to vinyl flooring, low-pile carpet, LVT, or ceramic tile. You can find flush mount styles and a wide variety of overlap styles to enable your floor to expand and contract as needed, and finished and unfinished designs are available.
4. End Bar or Cap
End bar moldings are shaped like reducers but have a wider range of applications. These transition strips can be used at doorways, around fireplaces, for different flooring transitions, and more.
End bars have a notch on one side to cover the edge, and the other sports a slope. This option can help bridge the gap between a door, laminate, or hardwood flooring and flooring options like carpet. End bars cover hardwood edges and ensure everything stays in place.
5. Multi-Function
The shape of a multi-function molding depends on the specific brand you purchase. These transitions perform as more than one type of transition molding, depending on the flooring you have in your home. Multi-function molding allows uniform transitions throughout your home, even with multiple flooring types.
You can find slim-trim options that act as an end cap, T-molding,, or reducer, giving you both function and design elements. You can also find options with additional possibilities. By using a cutting tool, you can adjust these pieces to suit your needs and create new varieties as you need them.
Transitions Between Different Flooring Types
Different types of floor transitions require more precise strips tailored to the specific floor materials. Balancing out flooring heights is a primary concern for most of these transitions. For example, moving from hardwood to carpet without transition pieces can create large gaps and tripping hazards.
Carpet to Tile Transition
Carpet transitions to thick flooring (like tile) present a significant height difference. Carpet texture varies from tile; a transition strip can help them combine well and protect the carpet edge from fraying.
Reducer transition strips achieve an even surface between carpet and tile flooring. Use a reducer with a metal strip and carpet tacks to ensure the carpeting remains stretched and in place. This transition strip covers the edges, creating a clean look and a safe transition between the carpet and the tile.
Carpet to Hardwood Transition
Like tile flooring, the transition from wood to carpet features a change in height. Flooring specialists use a carpet edge gripper to transition flooring lower than the carpet. This aluminum strip tacks to the subfloor, and the specialist forces the carpet into the toothed side of the strip.
You could also use T-molding for a hardwood-to-carpet transition. This transition strip goes in the small gap between the floors and has two pieces on both sides. Most installers use a T-molding assembly with a metal track nailed or screwed to the floor.
Vinyl to Tile Transition
Vinyl is a relatively thin flooring type, whereas tiles can be quite thick. Exposed tile edges can become a tripping hazard and chip from exposure without transition molding.
Much like a carpet-to-wood transition, you need a reducer strip for vinyl-to-tile transitions. A flooring specialist will typically screw a metal piece to the subfloor before covering the floor seams by snapping the top strip into the channel.
For a smooth transition, ensure the reducer’s curved end leads down to the vinyl. Since this transition piece comes unfinished, you can paint or stain it according to the color of your vinyl or tile.
Hardwood or Laminate Floor Transition Tips
In areas where hardwood or laminate meet a door threshold, step, or other flooring type, you may need a different kind of transition strip. The goal in these areas is to match the existing flooring, compensate for height gaps, and create a smooth transition.
End cap or end bar transitions may work best for a hardwood or laminate transition. If the two different flooring materials are the same height, you could also use a T-shaped aluminum transition strip. You’ll have to find one that matches the color or finish of both flooring types.
How to do Floor Transitions: 3 Creative Ways to Transition Between Different Floors
Homeowners can think outside the box when bridging the gap between two flooring styles. Consider these transition types to gradually move between spaces in an open floor plan:
1. Create an Irregular Edge Floor Transition
Create unique transitions between living spaces by cutting or positioning flooring materials at an angle or curve. Irregular transitions for flooring bring sections of your home together in an eye-catching way.
For example, you might merge two spaces through natural wood and tile. Rather than having the natural wood meet the tile with a transition strip, installers can create diagonal lines and patterns to make the change visually appealing.
2. Design an Accent Border
You could have an installer place decorative flooring borders to split up rooms. Homeowners might design a thin border with accent tiles or wood between doorways. This type of flooring transition may consist of the same materials as the floors, or the accent border could differ depending on how noticeable you’d like it to be.
3. Make a Buffer Zone
A buffer zone is a type of floor transition that prevents two flooring materials from meeting. Instead, you can create a buffer zone by placing a group of accent tiles between the two flooring materials. This approach helps ease the transition between flooring materials that differ in color.

3 Design Tips for Smooth Flooring Transitions
You can make a few design choices to help flooring transitions feel natural. Regardless of the types of flooring you use, we suggest the following tricks for your project:
1. Place Rugs Between Transitions
A throw rug is an economical way to connect flooring materials. You might position a throw rug in a hallway where natural wood shades are lighter or darker than the ones installed in a nearby bedroom. You can change out the rugs you use based on the decor you place throughout your home.
2. Paint Rooms Different Colors
Changing wall paint colors can add to your flooring transition. Whether you want to stick with natural wood materials throughout your residential space or place carpeting on some floors, you can make spaces stand out by choosing paint shades that complement the flooring you install.
3. Follow Natural Start and Stop Points
You can figure out where to place flooring transitions by following your home’s natural flow. I makes sense to change flooring materials, colors, and patterns where spaces start and end. Pay attention to doorways, countertops, and furniture when deciding where to place a flooring transition.
View Vinyl Flooring Buying Guide
Anticipating Transitions for Different Room Types
When planning a flooring project, it’s always vital to think ahead. It’s beneficial to replace the flooring across multiple rooms simultaneously to anticipate the best transition for your needs. You should consider how you use specific rooms in your house to decide on an effective transition and flooring installation for your routine.
Kitchen to Living Room Transitions
Kitchens are prone to frequent spills and foot traffic. Consider the multiple floor types available and opt for a material that lets you move from point A to point B efficiently with few tripping hazards.
Some families enjoy soft carpeting in the living room, but you might be better off with a low-maintenance material like laminate or vinyl that is easy to clean and sits at the same height as nearby flooring materials like natural wood and tile. A design step as simple as placing a flooring transition at the start of a kitchen peninsula or countertop will make it simple to create designated spaces for cooking versus spending time with family.
Bedroom to Hallway Transitions
Think about which direction you’d like your flooring materials to face when moving from bedrooms to hallways. If you plan to use natural woods or look-alike materials such as vinyl or laminates, consider whether you want the flooring planks to run vertically or horizontally. Knowing the answer to these questions will save your installer time and help you select the best transition options for your space.
Craft Seamless Transitions With 50Floor Planning and Installation
Transitions are an essential finishing touch for your flooring purchase, but it’s easy to overlook them during the selection and installation process. When you work with the experienced professionals at 50Floor, you’ll discover how much we care about these important details.
To find the flooring you love, start with our free in-home consultation. Browse a variety of samples in the comfort of your home, and compare your favorite styles to your current flooring. Our experts will share their knowledge and help you think about both your selection and your transition needs.
Once you’ve found the perfect flooring, enjoy hassle-free installation from one of our vetted professionals. Our installers are happy to move furniture, clear out old floors, examine subfloors, put new flooring in place and ensure it transitions seamlessly.
Ready to make your flooring dreams a reality? We’d love to make it happen. For unparalleled customer service and helpful advice at every step, schedule your free appointment with 50Floor today!