


Hardwood has always been a classy way to dress up your floors. Unfortunately, hardwood flooring can often be expensive or difficult to install. That’s why many homeowners are turning to tongue and groove wood flooring as an affordable way to achieve that sophisticated hardwood look.
If you’ve been wanting to take your old, worn-out flooring from drab to fab but haven’t been able to find the time or money, tongue and groove floors might just be your flooring fix. Keep reading to find out what exactly tongue and groove flooring is, the pros and cons of using it and how to install it in your home.
What Is Tongue and Groove Flooring?
The term tongue and groove flooring refers to the technique of fitting similar objects together by aligning their edges and joining them to make a single flat surface. This method of connecting floor pieces is particularly strong and effective because it interlocks the original two flat planks into one seamless piece.
Constructing with tongue and groove works by using flooring boards that have one side with a protruding ridge, the tongue, and a groove along the entire length of the board’s opposite side. By lining up the ridge side of a board with the groove side of another board and attaching them, a snug seam is created. The shorter-width sides of the boards also have small ridges and grooves so that all of the pieces used in a project can be completely interconnected.
Types of Tongue and Groove Floors
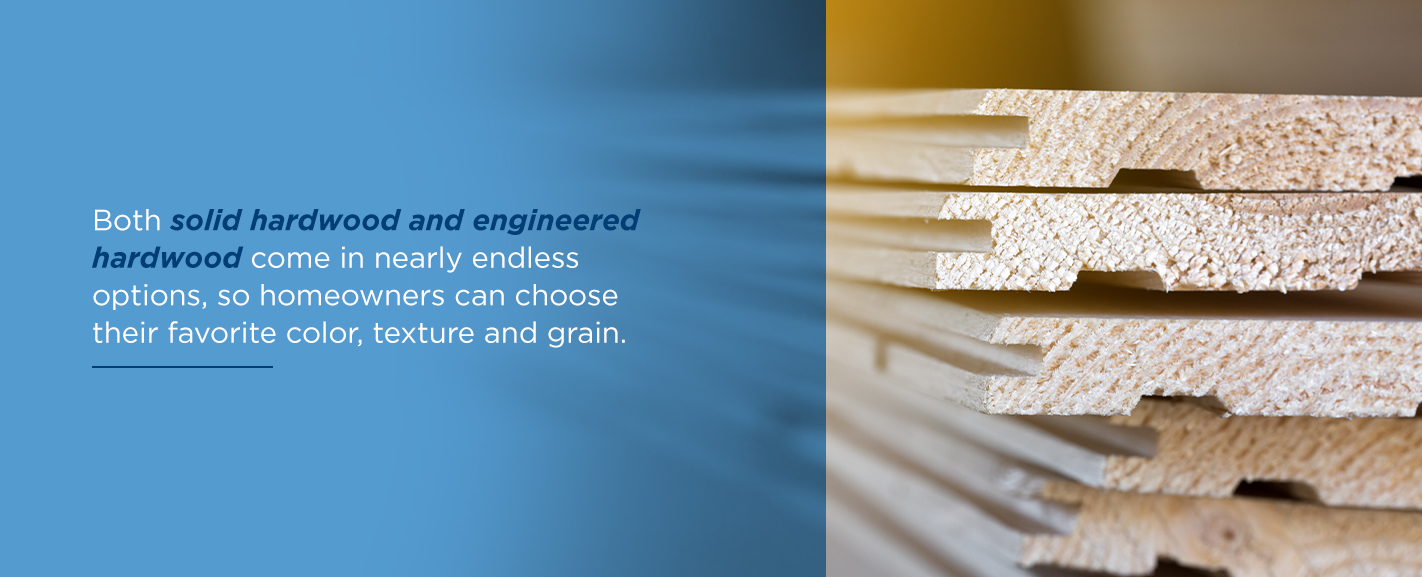
Although tongue and groove can apply to other types of floors, it is a staple of a good hardwood floor. When constructed by gluing together tongue and groove boards, hardwood floors are smooth and free of nails, making them both visually appealing and safe to walk on barefoot. Two different types of hardwood can be used for tongue and groove — solid and engineered. Both solid hardwood and engineered hardwood come in nearly endless options, so homeowners can choose their favorite color, texture and grain. Depending on your unique needs, you can pick the material that will suit your home and lifestyle.
These are the basic differences between the two:
- Solid hardwood: As its name suggests, solid hardwood is manufactured from a single piece of wood that is solid hardwood all the way through. Because solid hardwood is quite sturdy, pieces of a solid hardwood floor need to be nailed or stapled both to the floor and together to ensure they don’t shift. Solid hardwood is also more prone to moving or gapping in response to humidity.
- Engineered hardwood: Engineered hardwood planks consist of a layer of hardwood veneer over multiple plies of wood. This design makes engineered wood generally more stable than solid hardwood and possible to install with nails, staples, glue or floating. Engineered floors will not shift as easily as solid hardwood because it does not react to seasonal humidity as much. It can also be installed over a wider range of surfaces than hardwood, such as concrete, tile or linoleum.
How Is Tongue and Groove Flooring Made?
Careful woodworking is necessary to make tongue and groove floors. To create a snug seam between floorboards, precise cuts must be made to ensure that the tongue and groove sides fit perfectly. A table saw, shaper or router table are the best tools to cut tongue and groove joints. Although the shaper is the easiest method, all three pieces of equipment can be used to make groove and tongue flooring.
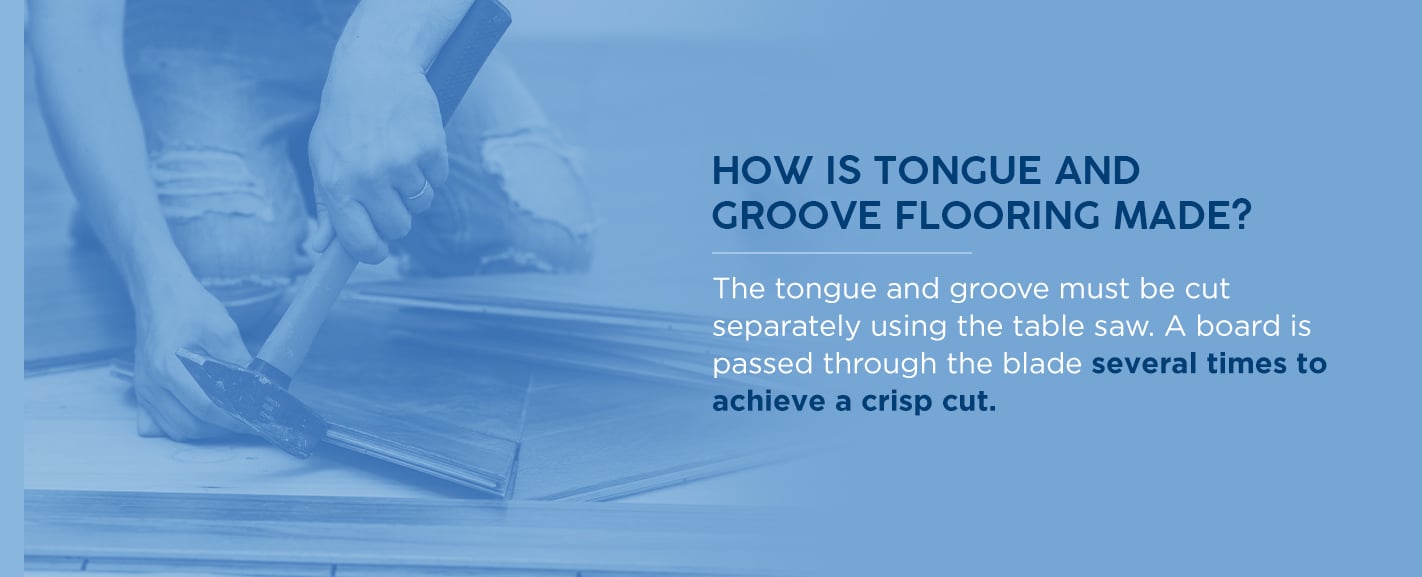
Depending on which tool is used, the cutting process varies. The tongue and groove must be cut separately using the table saw. A board is passed through the blade several times to achieve a crisp cut. Once the tongue side is complete, the groove side can be cut or vise versa.
The tongue and groove of a board can be cut in one pass using a router. Uniform boards can be cut with ease. However, this tool has less power and works best for cutting small quantities of boards.
A shaper can cut a tongue and groove board with one pass and has the power to cut a large amount of wood. Once the tongue and groove have been cut into the floorboards, they are ready to be used.
Luckily, you can leave this complicated process to the professionals by ordering from a wide selection of tongue and groove flooring ready for installation.
Pros and Cons of Tongue and Groove Floors
Flooring is a central and essential feature of your home. So before you commit to any kind of flooring, it’s important to know both the benefits and downsides of installing it. We’ve put together the main pros and cons of bringing tongue and groove wood flooring into your house below.
Pros
Check out the top reasons to install tongue and groove floors in your house:
1. Well-Crafted
Tongue and groove floorboards fit together seamlessly, solving many of the problems associated with traditional hardwood floors, such as warping, shrinking and loosening boards. The seams of a tongue and groove floor are so tight that when the right finish is applied, they can even be water-tight so you can install hardwood flooring in the kitchen or bathroom without fear of moisture damage.
2. Visual Appeal
In addition to being structurally sound, tongue and groove hardwood floors are aesthetically pleasing. Tongue and groove wood flooring is available in many designs, brands and finishes, so every homeowner is bound to find a style they like. And let’s face it, a good hardwood floor is always in fashion!
3. Cost-Effective
Installing tongue and groove floors can be less expensive than other types of flooring because using engineered hardwood and glue will save you from spending money on additional installation materials like a nail gun. Floating engineered hardwood is an especially inexpensive way to install tongue and groove flooring because it is a simple DIY method that does not require any special training. A floating floor simply means that the interlocking pieces are not nailed or glued to a subfloor and instead “float” above the floor, though they still need to be glued together. As a relatively easy technique, floating will save time as well by allowing your installer to complete the job quickly.
Cons
Now that you’ve heard the positives, here are the potential drawbacks to tongue and groove flooring:
1. Inseparable
The same snug fit that makes tongue and groove wood flooring so stable also makes it challenging to repair and replace. Make sure that you want to keep your hardwood flooring for a long time because taking the floorboards apart can be quite difficult. If you have a tongue and groove style hardwood floor and need to replace or repair one of the boards in the center of the floor, you will need to break apart many of the outer boards to get to the damaged one.
2. Labor Intensive
Because tongue and groove flooring must be precisely aligned, the installation can be a lengthy and tiring process. If installation ends up taking longer than anticipated, the cost of your flooring may go up. You don’t necessarily have to hire a professional crew to install your flooring correctly, but be aware that a DIY installation will require a good amount of time and effort.
3. Missed Connections
If you do choose to install your tongue and groove wood flooring on your own, you may have trouble getting the tongue and groove to match up at times. Gently tapping the boards together with a soft face mallet usually helps with this issue, but it’s not guaranteed to work. To save yourself a headache, you might want to get a professional to install your new hardwood floor.
How to Install Tongue and Groove Floors

Before your tongue and groove flooring installation, decide whether you want to use solid or engineered hardwood. Solid hardwood will need to be nailed down, while engineered hardwood tongue and groove planks require only glue to connect them.
With engineered hardwood, you can create a floating floor that’s not actually attached to the base floor of your house and easily install it as a DIY project. If you choose to do a floating floor, make sure you put down an underlayment to act as a moisture barrier and prevent your hardwood pieces from expanding or contracting.
Once you have chosen the right material for your home, you are ready to follow these steps for installation:
Step 1: Prep the Room
To get your room ready for new flooring, remove all of the baseboards and notch out the door so the new floorboards will fit snuggly beneath. Apply underlayment if necessary.
Step 2: Draw a Guideline
To ensure you lay the first row in a straight line, measure a guideline and mark it on the floor with chalk. Leave about a quarter-inch gap between the boards and the wall, so there’s room for the floor to expand and contract. This space will be covered by a trim piece later.
Step 3: Lay the First Row
Place the first board with its tongue facing toward the wall in a corner of the room. Lay the second board next to it so that their shorter ends are touching, and pull the second piece as close to the first as it can get. Repeat this process until you have a full first row. When you reach the last floorboard of the first row, you will likely need to cut this piece to size. Measure the remaining space, including a small gap for expansion, and cut the board to fit.
Step 4: Adhere the Floorboards
If you are happy with how the pieces aligned, either nail them into place or secure them with an adhesive depending on whether you’re using solid or engineered hardwood. It is vital to know how to nail tongue and groove floor planks properly, so the nails are hidden. Flooring nailers allow you to nail through the groove of the new board into the subfloor, disguising the nail, so it is not visible from the service. You can secure the edge of planks that border the room with nails because they will be covered by trim eventually. Gluing the joints of your floating floor together will help you avoid any gaps in your hardwood. When using glue, be sure to wait until the first row is set before moving on to subsequent rows.
Step 5: Repeat the Process
For the remaining rows, slide the boards together and then press the tongue firmly into the groove to secure the placement. If the boards aren’t attaching easily, use a mallet to tap them until they lock into place. You can also use a scrap piece of wood and a hammer. Tap gently to avoid causing damage. Once the boards are properly in place, nail the solid hardwood down or glue the engineered hardwood together. Continue this method for the rest of the rows.
Try to stagger your rows so that the seams don’t line up. When you get to the end of a row, use a tape measure to get an exact measurement of what size piece to cut to fill the remaining floor space. On the last row, you might need to make long cuts to get the boards to fit, but the expansion gap should grant you enough space to slide the boards into place.
Step 6: Paint and Polish
If you selected raw wood, finish it off with any necessary paints and stains. If you have any exposed nails, you want to cover them with wood putty first. Once the floor is dried and complete, finish it off by attaching the trim. This will cover any gaps and will highlight the polished final product.
Installation requires time, tools and careful attention to detail. You can try to do it yourself, or skip the hassle and let us do it for you!
To ensure that your new tongue and groove flooring is installed correctly, leave it to the professionals. You won’t have to lift a finger with our affordable installation service. Our experts at 50Floor have extensive experience laying tongue and groove, so you can trust them to install the new flooring in your home.
Tongue and Groove vs. Lock and Fold vs. Plank Flooring
Tongue and groove is one of the most popular types of flooring today. However, other methods like lock and fold and plank flooring are also used.
Here is a comparison between these options:
- Tongue and groove: Tongue and groove boards are made from hardwood and engineered wood. Installing a tongue and groove wood floor is easier than plank flooring but slightly more complicated than lock and fold flooring. The individual boards fit together snuggly and are secured to the floor with nails or glue. Engineered tongue and groove floors can be floated on top of existing flooring. However, this method requires glue to prevent the boards from sliding apart. The extra adhesive ensures long-lasting and durable floors.
- Lock and fold: Also known as click system flooring, this method uses boards that “click” into place. Lock and fold flooring is usually made from engineered wood or laminate. Like tongue and groove floors, the edges of these boards are designed to fit into each other. However, lock and fold flooring does not require any nails or adhesives. There is no need to fasten the interlocking boards to the subfloor. This is one of the easiest floors to install, as it can be floated above most existing floor materials.
- Plank flooring: The plank flooring method is great for achieving a rustic style. Wood boards are measured, cut square and attached to the floor for a handmade look. Reclaimed wood and scrap pieces are often used for plank flooring. The installation process can be tedious and requires more time and expertise than the other flooring types.
Find Your Perfect Flooring at 50Floor
If you’re interested in putting engineered hardwood floors in your home, contact 50Floor today to schedule your free in-home consultation. We offer flooring options in a wide variety of materials and designs, all with a price match guarantee so you can know you’re getting the best price possible.
The best part? You never have to leave the house! With 50Floor, you get to shop through a wide variety of flooring styles from the comfort of your living room. Our customer service provides expert advice to guide you through the floor buying process from selection to installation.

Frequently Asked Questions
What is the difference between click & lock and tongue & groove flooring systems?
When it comes to flooring, choosing the right installation method is crucial. Two popular systems are Click & Lock and Tongue & Groove, each with distinct characteristics and installation processes.
Click & Lock Flooring Systems
- Quick and Easy Installation: Click & Lock flooring systems are designed for simplicity. The planks feature interlocking edges that snap together without the need for glue, nails, or staples. This makes installation a breeze, even for those with minimal DIY experience.
- No Adhesive Required: One of the standout features of Click & Lock is that it doesn’t require adhesive. The planks lock together firmly, providing a stable and secure connection.
- Ideal for Floating Floors: This system is excellent for floating floor installations, where the flooring isn’t directly attached to the subfloor. This offers flexibility in various settings, including over existing floors.
Tongue & Groove Flooring Systems
- Traditional Method: Tongue & Groove flooring involves a tongue on one plank fitting into a groove on the adjacent plank, creating a tight, interlocking connection. This method has a long history in hardwood flooring.
- Requires More Tools and Skills: Unlike Click & Lock, installing Tongue & Groove flooring typically involves applying adhesive to the grooves or securing the planks with nails or staples. This method can be more labor-intensive and may need more tools and expertise.
- Durability and Stability: When properly installed, Tongue & Groove flooring offers excellent durability and stability. However, the quality of the installation and the condition of the subfloor are critical to its performance.
- Versatile Installation Options: This system supports both nail-down and glue-down installations, making it suitable for various types of hardwood and engineered hardwood floors.
Key Takeaways
- Installation: Click & Lock systems are quicker and easier, making them ideal for DIY projects. Tongue & Groove systems require more effort and professional skills.
- Adhesive Use: Click & Lock doesn’t need adhesive, while Tongue & Groove often does.
- Durability: Both systems offer durability, but Tongue & Groove flooring highly depends on meticulous installation.
Choosing between Click & Lock and Tongue & Groove largely depends on your installation skills, the project timeline, and the specific type of flooring you prefer.
What products are available in the tongue & groove category?
Tongue and groove boards are made from hardwood and engineered wood. Installing a tongue and groove wood floor is easier than plank flooring but slightly more complicated than lock and fold flooring. The individual boards fit together snugly and are secured to the floor with nails or glue. Engineered tongue and groove floors can be floated on top of existing flooring. However, this method requires glue to prevent the boards from sliding apart. The extra adhesive ensures long-lasting and durable floors.
For those considering this style of flooring, here are some specific products available in the tongue & groove category:
- Woodland Treasures 5/8 in. X 7.5 in. X 95.5 in. Long Plank Engineered Hardwood Flooring: Ideal for those who prefer a classic look with the durability of engineered construction.
- Wood Vineyard Pinot 3/8 in. X 5 in. Wire-Brushed Engineered Hardwood Flooring: This option features a wire-brushed finish for a more textured surface, adding character to any room.
- Choice Collection 1/2 in. X 7.5 in. Engineered Hardwood Flooring: A versatile flooring solution that works well in both traditional and contemporary settings.
- VacuuBond Easy Install 1/4 in. X 6.65 in. Sustainable Real Wood Planks: These planks are not only easy to install but also environmentally friendly, making them a great choice for eco-conscious homeowners.
Each of these products brings its unique aesthetic and functional benefits to your home, ensuring there is something to suit every taste and requirement. Whether you are renovating an old space or crafting a new one, these tongue-and-groove hardwood floors offer both the classic appeal of wood and the enhanced durability of engineered flooring.